Stripe payment provider
In this page you will learn how to configure and use the Stripe as the payment provider with Spike.
Requirements
Spike v3 has been tested with and works best with Cashier (Stripe) version 15. If you are using Cashier (Stripe) in your project already, please make sure to follow the Upgrade guide (Cashier) to update it to version 15.
Using Stripe as the payment provider
In order to use Stripe as your payment provider in Spike, you need to first remove any previously installed payment providers, and then install Cashier (Stripe) v15 composer package:
# Remove the other payment provider
composer remove laravel/cashier-paddle

# And add the Stripe payment provider
composer require laravel/cashier:"^15.0"
Then, run the spike:install command again to set up the payment provider and add any missing environment variables.
php artisan spike:install
Then, if you have any billable models using the Opcodes\Spike\Paddle\SpikeBillable trait, replace it with the
Stripe version of the trait - Opcodes\Spike\Stripe\SpikeBillable.
And lastly, run the migrations:
php artisan migrate
Stripe-specific configuration options
Any Stripe-specific configuration options can be found in the stripe key of your config/spike.php configuration file.
Below are the descriptions and example usage of a few of them.
Invoice details
Spike provides the ability to download the subscription and product purchase invoices right from the billing portal. These invoices must contain certain pieces of information, such as your company name, the product name, etc. You should configure these details in the config/spike.php configuration file:
'stripe' => [

    'invoice_details' => [
        'vendor' => 'Acme',
        'product' => env('APP_NAME', 'Spike'),
        // 'street' => 'Main Str. 1',
        // 'location' => '2000 Antwerp, Belgium',
        // 'phone' => '+32 499 00 00 00',
        // 'email' => '[email protected]',
        // 'url' => 'https://example.com',
        // 'vendorVat' => 'BE123456789',
    ],

    //
],
In order to generate invoice PDFs you must install Dompdf:
composer require dompdf/dompdf
It's possible to use a different PDF rendering engine, which you can read about here.
How to set up Stripe products
- Log in to your Stripe dashboard.
- Go to products.
- Click on Add product.
- Enter the name & description for the product.
- For the price, select the Standard pricing model, enter the price of the product, and select the One time price option. Make sure the currency is the same as you've set up in Spike.
- Click on Save product in the top-right corner.
- You will be redirected to the product's info page, and you will find the price ID in the Pricing section:
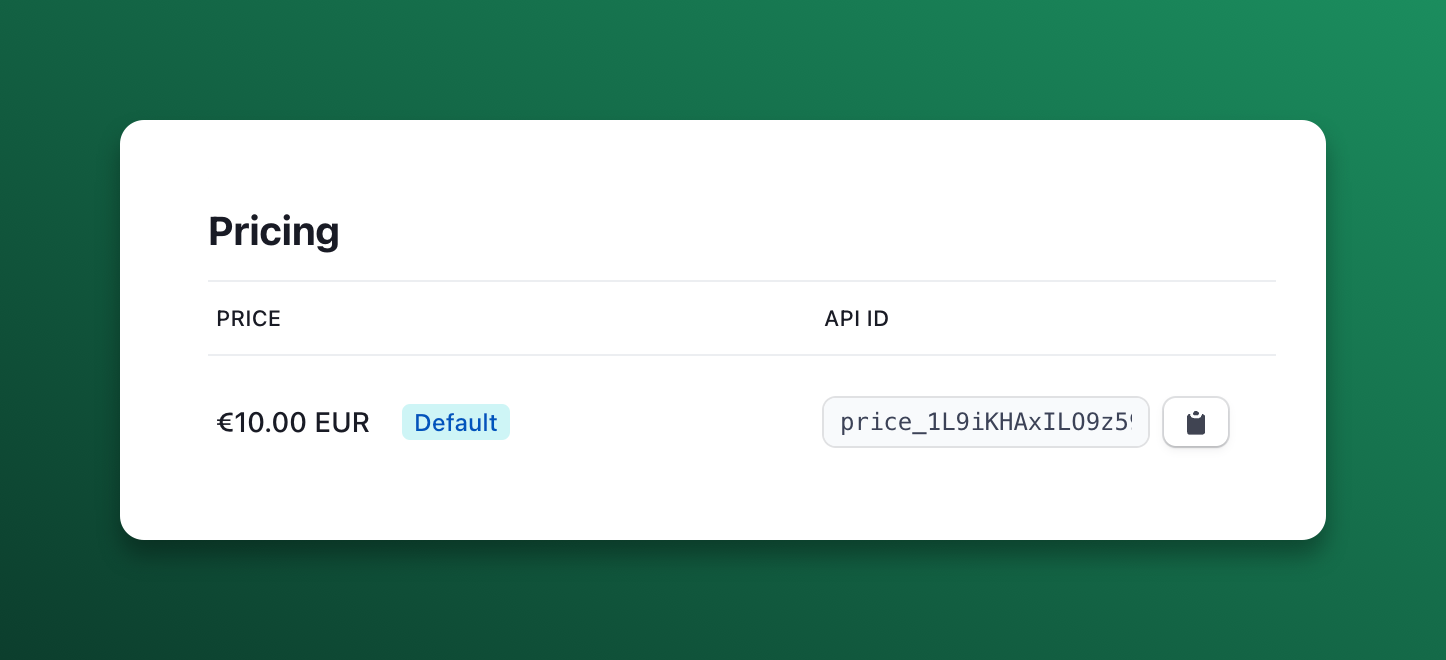
- Copy the price ID into the
payment_provider_price_idconfiguration insideconfig/spike.php.
Multi-currency support
Spike v3 supports multiple currencies when using Stripe as your payment provider, but a single invoice can only contain one currency. This means that Spike will:
- Validate that all products in a cart use the same currency
- Pass the correct currency information to Stripe during checkout
- Handle currency-specific price formatting
Make sure your Stripe products are configured with the appropriate currencies that match your Spike product configurations. Each Stripe Price object should have the correct currency set to match the currency attribute in your Spike products.
Verifying Stripe product setup
Spike has a helper command to help you verify whether your configured products and subscriptions have the correct associated payment_provider_price_ids configured. Just run this command:
php artisan spike:verify
Stripe webhooks
Although, for the most part, Spike works without setting up Stripe webhooks, there are certain edge cases where the webhooks are necessary, such as being notified from Stripe about failed payments.
In order to keep Spike in sync with Stripe, you should go to Stripe's Webhook dashboard to configure these webhooks to be sent to your application's /stripe/webhook URI. You should enable webhooks for the following events:
customer.subscription.createdcustomer.subscription.deletedcustomer.subscription.updatedcustomer.updatedcustomer.deletedinvoice.payment_action_requiredinvoice.payment_succeeded
Because Spike is built on top of Laravel Cashier, you have access to a convenience cashier:webhook Artisan command. This command will create a webhook in Stripe that listens to all the events required by Cashier:
php artisan cashier:webhook
By default, the created webhook will point to the URL defined by the APP_URL environment variable and the cashier.webhook route that is included with Cashier. You may provide the --url option when invoking the command if you would like to use a different URL:
php artisan cashier:webhook --url "https://example.com/stripe/webhook"
The webhook that is created will use the Stripe API version that your version of Cashier is compatible with. If you would like to use a different Stripe version, you may provide the --api-version option:
php artisan cashier:webhook --api-version="2019-12-03"
After creation, the webhook will be immediately active. If you wish to create the webhook but have it disabled until you're ready, you may provide the --disabled option when invoking the command:
php artisan cashier:webhook --disabled
Webhooks & CSRF protection
Since Stripe webhooks need to bypass Laravel's CSRF protection, be sure to list the URI as an exception in your application's App\Http\Middleware\VerifyCsrfToken middleware or list the route outside the web middleware group:
protected $except = [
    'stripe/*',
];
Verifying webhook signatures
To secure your webhooks, you may use Stripe's webhook signatures. For convenience, Spike uses Cashier and automatically includes a middleware which validates that the incoming Stripe webhook request is valid.
To enable webhook verification, ensure that the STRIPE_WEBHOOK_SECRET environment variable is set in your application's .env file. The webhook secret may be retrieved from your Stripe account dashboard.
Using Stripe Checkout with Spike
Spike allows you to use Stripe Checkout for the final payment step. This has the benefit of allowing your customer to use payment methods other than credit cards, such as Apple Pay, Google Pay, Klarna, etc. It also has a familiar feel as well, which your customers might appreciate.
If you'd like to use Stripe Checkout for the final payment step, you can do so by enabling it in the config/spike.php configuration file:
'stripe' => [
    // ...

    'checkout' => [
        'enabled' => true,

        // ...
Note on invoices
By default, Stripe Checkout does not create invoices for one-time purchases. The feature is opt-in, because one-time purchase invoices created post-checkout are not free (see this Stripe support article).
You can opt in and enable invoice creation for products in the config/spike.php configuration file:
'stripe' => [
    // ...

    'checkout' => [
        // ...

        'generate_invoices_for_products' => true,
    ],
Invoices for subscriptions are created as usual, even when using Stripe Checkout.
Default locale
By default, Stripe Checkout chooses the best locale for your customers, based on their browser's locale. You can override the default by one of the supported Stripe Checkout's locales by setting it in the config/spike.php configuration file:
'stripe' => [
    // ...

    'checkout' => [
        // ...

        'default_locale' => 'nl',
    ],
Branding your Stripe Checkout
If you enabled Stripe Checkout in Spike, don't forget to also update the branding for your Stripe Checkout in the Branding Settings page.
Using Coupons
Spike allows the use of Stripe's Promotion Codes both for Subscriptions and Products. The coupons are created directly in Stripe and customer-usable promotional codes can be used by your customers to apply discounts for one-off product purchases or even subscriptions.
Enable coupons in Spike
To enable coupons in Spike, first enable it in config/spike.php:
'stripe' => [
    //...

    /*
    |--------------------------------------------------------------------------
    | Allow users to enter discount codes
    |--------------------------------------------------------------------------
    |
    | Configure whether users should be able to enter discount codes.
    | Discount codes can be configured in the Stripe dashboard.
    |
    */

    'allow_discount_codes' => true,

    //...
],
Generating coupons
Coupons must be created directly in Stripe, under "Products" -> "Coupons".
When creating coupons, make sure to also enable "Use customer-facing coupon codes", which will allow your customers to enter the promotional code during their checkout flow.
For example, if you create a promotional code "20OFF" like so:
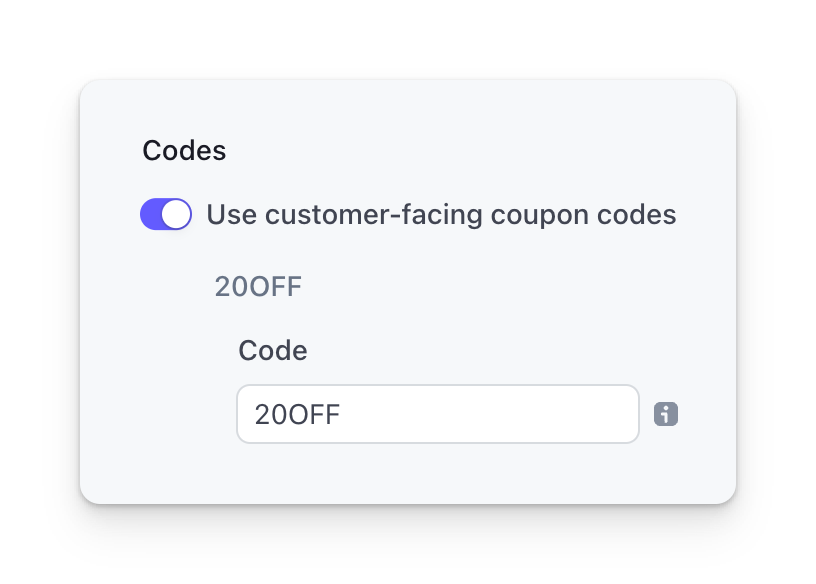
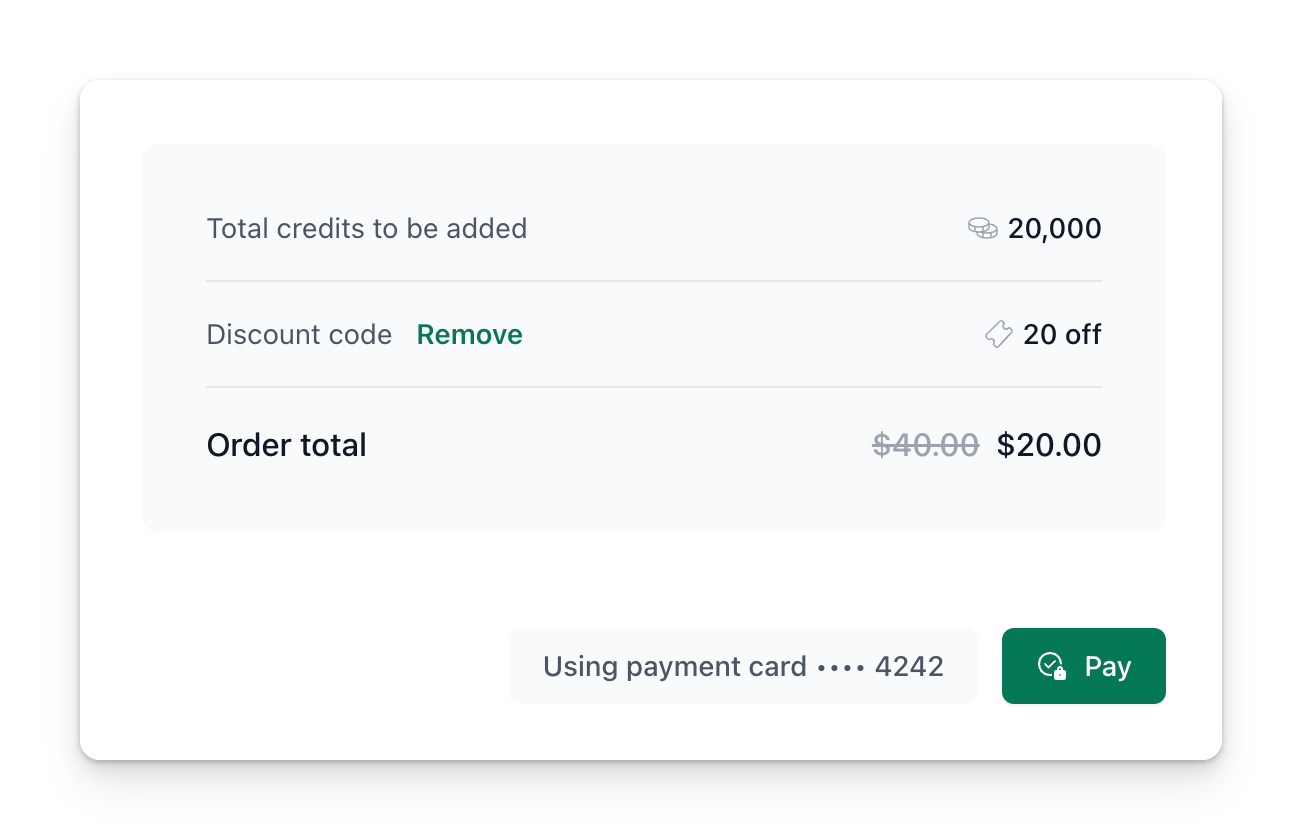
The customer will be able to enter "20OFF" in the discount input field and apply it to their shopping cart or subscription flow:
Known limitations
Stripe has a lot of options available when creating coupons and their promotional codes. There are a few known limitations you should know about when creating these coupons in Stripe.
- Customers can only enter the customer-facing coupon codes. It will not accept the Stripe IDs of coupons or promotions. See above for an example.
- Customer can only use one coupon at the time. They will have to remove the current coupon before they can use a different one.
- Fixed amount discount must use the same currency as your products.
- Some coupon limitations in Stripe (e.g. first order only, minimum order value, etc.) cannot be used when applying coupons via API, which is how Spike works.
- Coupons recurring for X number of months will still apply to the full year when a yearly subscription is selected. Monthly subscriptions work as expected.
Behaviour when switching subscription plans
There are two ways Spike can behave when the user has previously used a coupon and is now switching to a different subscription plan. It can either reuse the same coupon, which will show up to the user when they're switching to a different plan, or it can ignore the previously-set coupon.
You can set this in config/spike.php like so:
'stripe' => [
    // ...

    /*
    |--------------------------------------------------------------------------
    | Persist applied discounts when switching plans
    |--------------------------------------------------------------------------
    |
    | When enabled, the previously applied discount code will carry over
    | to the new plan when switching plans. When disabled, the discount
    | will be removed when switching plans.
    |
    */

    'persist_discounts_when_switching_plans' => true,

    //...
],
Since Spike v3.19.0 it is now also possible to choose whether Spike should allow incomplete subscription plan updates. If the payment fails during subscription update, it can either leave the subscription in an incomplete/past_due state with the new plan, or roll back to the old plan before the payment attempt.
You can set this in config/spike.php like so:
'stripe' => [
    // ...

    /*
    |--------------------------------------------------------------------------
    | Allow incomplete subscription updates
    |--------------------------------------------------------------------------
    |
    | When enabled, subscription plan changes will proceed even if the payment
    | for price difference fails. This may result in subscriptions going into
    | a "past_due" state that may be considered inactive. When disabled,
    | plan changes will fail completely if payment cannot be completed.
    |
    */

    'allow_incomplete_subscription_updates' => false,

    // ...
],
It is now disabled by default, meaning all new Spike installations will stop subscription updates if the payment fails and display a "Card Declined" message to the user.