
Hello and welcome to the inaugural post on the Spike Blog! Whether you're a seasoned Laravel developer, just dipping your toes into the world of PHP, or somewhere in between, you've come to the right place. In this blog, we'll explore the ins and outs of Spike, our Laravel package that's all about simplifying the billing process for your web application projects. We are thrilled to embark on this journey with you and look forward to helping you master the world of Laravel development with the power of Spike.
First, let's take a moment to talk about Spike. Our vision when developing Spike was to create an easy-to-use Laravel package that would simplify taking one-off payments and subscriptions using Stripe. The world of digital transactions can be daunting, filled with complex APIs, PCI compliance issues, and subscription management woes. With Spike, we aimed to tackle these challenges, allowing developers to focus on what they do best: creating fantastic web applications.
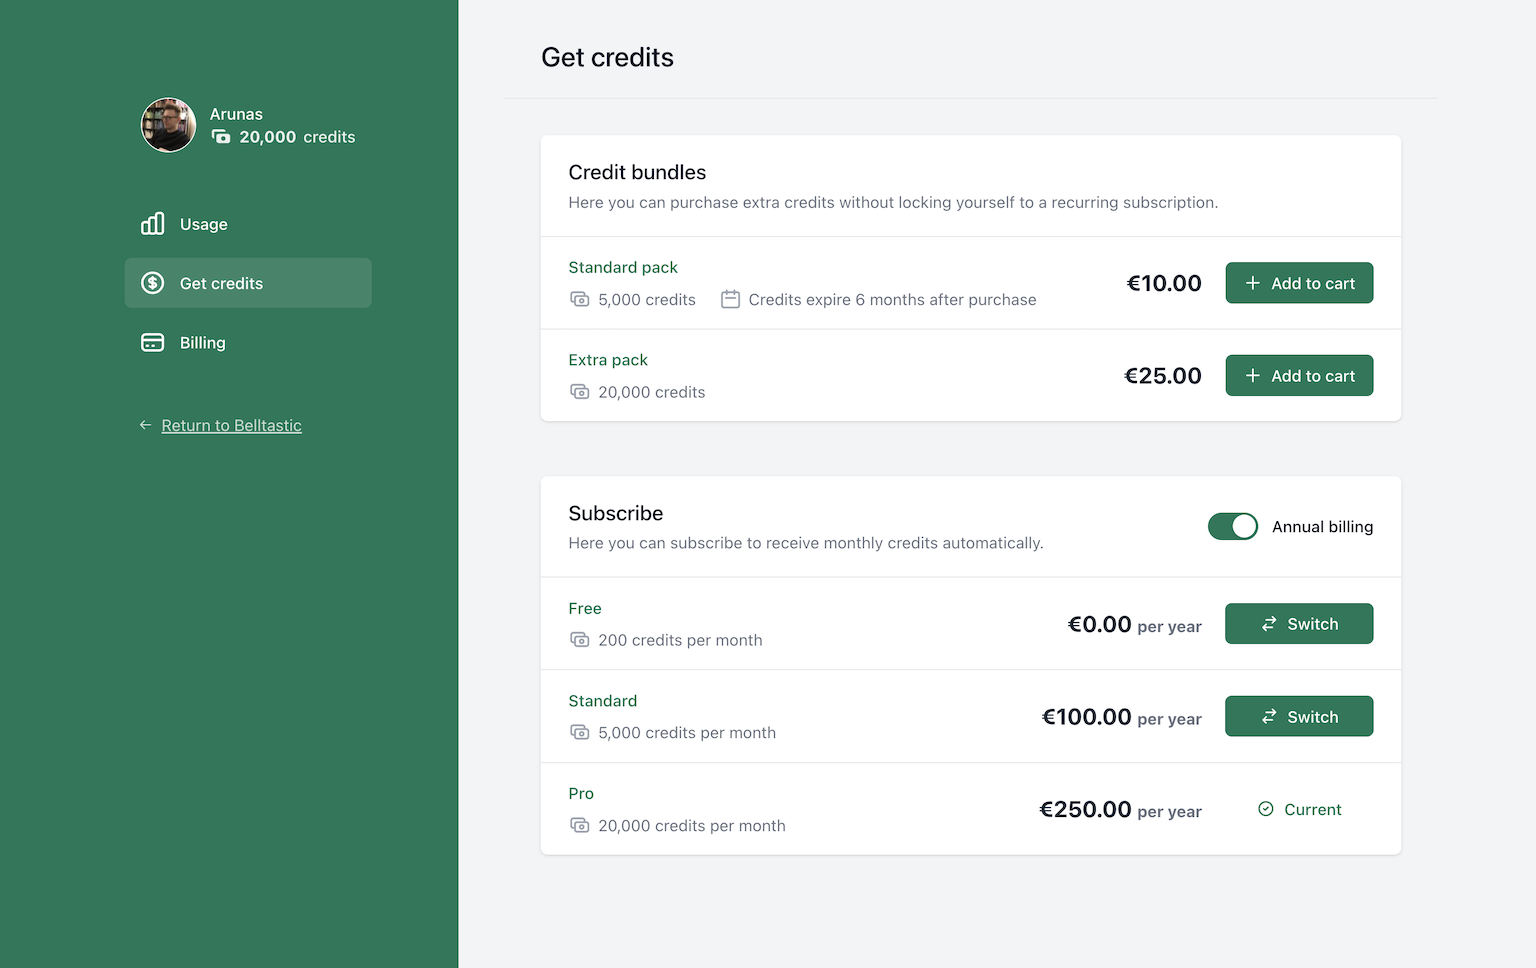
Spike adds a user-friendly billing portal to any Laravel project. After configuring the subscription plans, your users can easily subscribe, cancel, resume, and manage their payment methods. Spike integrates with Stripe, the most popular payment processor, allowing you to start accepting payments in no time, freeing you from the intricacies of payment gateway APIs. In short, Spike is all about making billing and subscription management straightforward, so you can devote more time and energy to building and improving your application.
Here on the Spike Blog, our mission is to provide you with all the resources you need to successfully use Spike in your Laravel projects. We'll offer how-to guides, deep dives into Spike's functionality, best practices for managing payments and subscriptions, and tips for using Spike to enhance your Laravel applications.
In future posts, you can look forward to:
- Getting Started with Spike: A step-by-step guide on installing and configuring Spike in your Laravel application.
- Deep Dive into Spike's Features: Detailed articles exploring Spike's various functionalities, including setting up the billing portal, managing subscriptions, and handling one-off payments.
- Integrating Spike with Popular Payment Processors: Guides on how to seamlessly connect Spike with different payment gateways.
- Troubleshooting with Spike: Tips and tricks for solving common problems you may encounter when using Spike.
- Advanced Spike Usage: Explore advanced use-cases and customization possibilities to make the most of Spike in your application.
- How-to's for re-creating the functionality on your own: If you can't afford Spike and have time on your hands, we'll teach you exactly how to process payments like Spike does.
We're excited to introduce you to the world of Spike, and we can't wait to see the fantastic applications you'll create using this tool. Stay tuned to the blog for insights, tutorials, and best practices to empower your Laravel development journey with Spike.
Remember, we're always here to help you navigate the world of Laravel billing. Feel free to reach out with any questions, suggestions, or topics you'd like us to cover in future blog posts. Happy coding!