
In today's fast-paced digital economy, the ability to handle online transactions efficiently is a critical component of a successful business. Particularly, recurring payments have become a popular revenue model that enables businesses to retain customers and ensure steady, predictable income. They are commonly used in various sectors such as digital subscriptions, online courses, and software as a service (SaaS) products.
If you're using Laravel, an open-source PHP framework that simplifies the task of building complex web applications, managing recurring payments can be easily achieved with the help of a powerful package: Laravel Cashier. The beauty of this package lies in its simplicity and the seamless integration it provides with the Laravel framework.
Laravel Cashier provides an expressive, fluent interface to Stripe's subscription billing services, enabling the handling of recurring payments directly from your Laravel application. For European Laravel developers and businesses, it conveniently supports the Euro (€) currency, making it an excellent choice for implementing recurring payments.
In this post, we'll guide you through the steps required to set up recurring payments in your Laravel application using Laravel Cashier. So whether you are building a content subscription site, an e-learning platform, or any business that requires recurring billing, this guide will help you get it up and running.
Understanding Laravel Cashier
Before we delve into setting up recurring payments, it's essential to understand what Laravel Cashier is and what it can do. Laravel Cashier is an official Laravel package designed to simplify the task of handling subscriptions and billing. It's an interface to Stripe's and Braintree's subscription billing services, providing a fluent, easy-to-use, and Laravel-esque way of managing the complexity of recurring billing.
Laravel Cashier handles almost all the boilerplate subscription billing code you dread writing, such as creating subscriptions, managing subscription plans, handling coupons, swapping subscription, subscription "quantities", cancellation grace periods, and even generating invoice PDFs.
However, its features are not limited to handling recurring payments. Laravel Cashier can manage one-off charges and even allow the generation of invoice PDFs, giving you a comprehensive solution for all your billing needs.
In the subsequent sections, we will set up our Laravel environment, integrate Laravel Cashier, and implement a simple recurring billing system. Whether you're new to Laravel or an experienced developer, this guide should provide the information you need to start monetizing your Laravel application.
Setting up your environment
Before we can dive into integrating Laravel Cashier, we must ensure our development environment meets the prerequisites required to use this package.
First, we'll be using Laravel 10.x for this article. If you want to follow along, make sure your Laravel application as at version 10.x or higher. You can check your Laravel version by running the command php artisan --version in your terminal.
Last but not least, since Laravel Cashier is a wrapper for Stripe's subscription billing services, you'll need a Stripe account. If you don't have one, head over to Stripe's website and create an account. Stripe is a globally recognized service, offering robust features, high-level security, and is especially popular among developers for its developer-friendly documentation.
Once you've set up your Stripe account, you will need to obtain your API keys. Stripe provides two pairs of API keys: one for testing (publishable key and secret key), and one for running transactions in live mode. For development purposes, we will use the test keys. Make sure to enable Test Mode first so you’re viewing API keys for the test environment. This will also allow you to make fake payments which we'll discuss later.
You can find your API keys by logging into your Stripe Dashboard and navigating to Developers > API Keys.
Remember to store these keys safely; you'll need them in the next steps when we integrate Laravel Cashier. Note: Never share your secret keys, as they can be used to make changes to your account.
In the next section, we will go over how to integrate Laravel Cashier into your Laravel application. With your environment set up and your Stripe account ready, you're well on your way to implementing recurring payments.
Integrating Laravel Cashier
Now that your environment is ready, we can start integrating Laravel Cashier. We'll begin by installing the package via Composer. If you're not familiar with Composer, it's a tool for dependency management in PHP, allowing you to manage packages that your project depends on.
Install Laravel Cashier
Once you have your Laravel app set up, open your terminal, navigate to your project's root directory, and run the following command:
composer require laravel/cashier
This command will download Laravel Cashier and its dependencies into your project.
Configure API keys
Next, you need to set your Stripe API keys. Open your .env file in your project's root directory. Add the following lines and replace the placeholders with your Stripe API keys:
STRIPE_KEY=<your-stripe-publishable-key>
STRIPE_SECRET=<your-stripe-secret-key>
.env
Remember to replace <your-stripe-publishable-key> and <your-stripe-secret-key> with your actual Stripe keys you found in the “Developers” → “API Keys” page.
Database migrations
Laravel Cashier comes with several database migrations out of the box. These migrations add several columns to your users table and create a new subscriptions table to hold all of your customer's subscriptions:
Run the migrations with:
php artisan migrateAfter this, Laravel Cashier should be successfully integrated into your Laravel application. Remember, Laravel Cashier is a direct interface to Stripe's subscription services, so it's essential to familiarize yourself with the Stripe API and the subscription functionalities it provides.
Setting the currency
In this article, we'll work in Euros (€), so let's set the Cashier currency simply by adding an environment variable to your .env file:
CASHIER_CURRENCY=eur.env
If you would like to use a different currency, make sure it's supported by Stripe first. Here you can find a list of currencies supported by Stripe.
In the next section, we will create a subscription model, define plans, and set up pricing for your services.
Creating a subscription plan
Having integrated Laravel Cashier, we're now ready to create a subscription model. A subscription model refers to the logic and structure behind your app's subscription-based services.
Define plans in Stripe
The first thing you need to do is define your subscription plans in Stripe. A plan in Stripe consists of an ID, name, price, and billing cycle. You can create plans via the Stripe Dashboard or through the Stripe API.
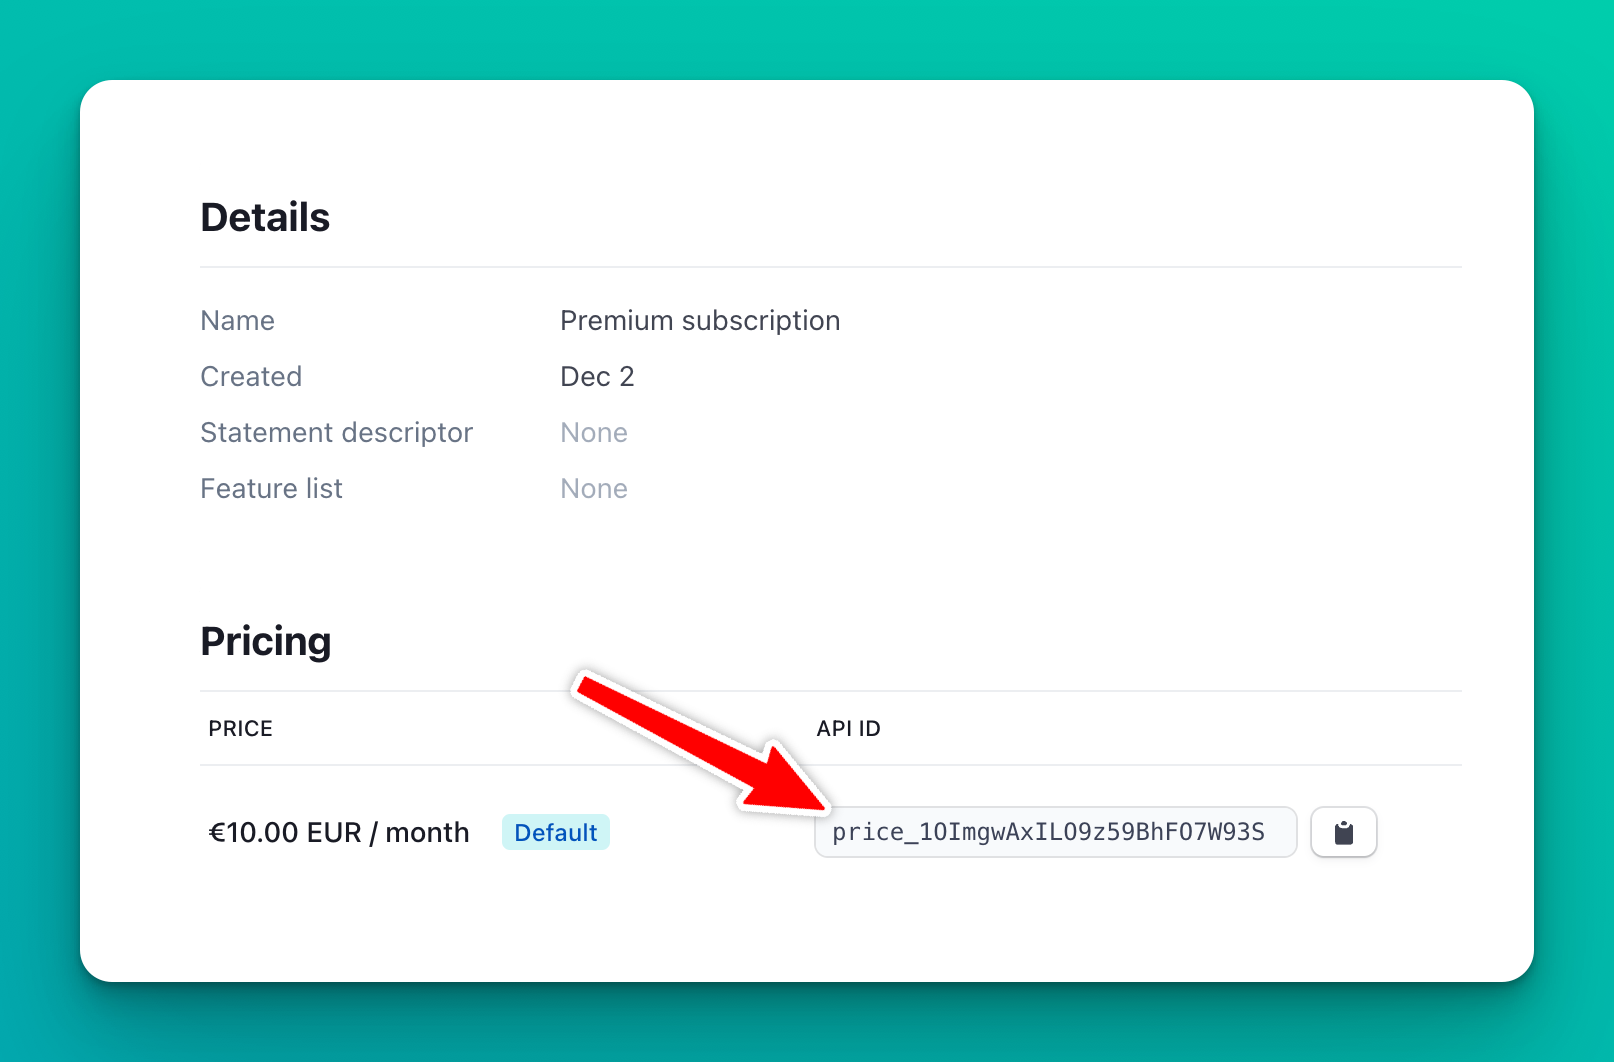
For this example, we'll create a simple "Premium Plan" priced at €10 per month. To do this, navigate to the Product catalog in Stripe, click on "+ Add product", give your product a name, select "recurring" pricing and set a price for it.
Take note of the Price ID that Stripe generates, as we will be using it in our Laravel application.
Implementing the subscription flow
Now that we have a subscription model, it's time to implement a flow for handling user subscriptions, cancellations, and renewals. The subscription flow largely involves creating routes, controllers, and views that will guide users through the process of subscribing, canceling, or renewing their subscriptions.
Creating subscription controller
The SubscriptionController will handle the logic for each of the actions in the subscription process. If you haven't already created this controller, you can do so by running the command php artisan make:controller SubscriptionController in your terminal.
Then, in your SubscriptionController, define the methods for creating, storing (i.e., subscribing), cancelling, and resuming subscriptions. You can use the Laravel Cashier methods like newSubscription(), cancel(), and resume() to perform these actions.
For example, here is the store() method for setting up the new subscription:
<?php

namespace App\Http\Controllers;

use Illuminate\Http\Request;
use Illuminate\Support\Facades\Auth;

class SubscriptionController extends Controller
{
    public function create()
    {
        return view('subscription.create');
    }

    public function store(Request $request)
    {
        // get the authenticated user
        $user = $request->user();

        // retrieve the payment method token from the form
        $paymentMethod = $request->input('paymentMethod');

        try {
            // Create the subscription
            $user->newSubscription('default', 'price_1OImgwAxILO9z59BhFO7W93S')
                 ->create($paymentMethod);

            return back()->with('message', 'You have successfully subscribed to our plan.');

        } catch (\Exception $e) {

            return back()->with('error', $e->getMessage());
        }
    }

    public function cancel(Request $request)
    {
        $request->user()->subscription()->cancel();

        return back();
    }

    public function resume(Request $request)
    {
        $request->user()->subscription()->resume();

        return back();
    }
}
app/Http/Controllers/SubscriptionController.php
Creating subscription routes
You'll need to create routes that users can navigate to in order to handle subscriptions. In your web.php file, add the following routes:
Route::get('/subscribe', 'SubscriptionController@create')->name('subscription.create');
Route::post('/subscribe', 'SubscriptionController@store')->name('subscription.store');
Route::post('/cancel', 'SubscriptionController@cancel')->name('subscription.cancel');
Route::post('/resume', 'SubscriptionController@resume')->name('subscription.resume');
routes/web.php
Each of these routes corresponds to a specific action in the subscription process. They all point to methods that we'll define next in our SubscriptionController.
Setting up subscription views
Next, you'll need to create views that users will see as they go through the subscription process. These views might include a form for subscribing, a confirmation page, a cancellation page, and a page for successfully resuming a subscription.
For the subscription form, for example, you might include fields for the user's credit card information and a dropdown for selecting a subscription plan. This form would then send a POST request to the /subscribe route when submitted.
Note: collecting payment card details
Instead of collecting payment card details ourselves, and having to deal with PCI compliance of securely storing credit card information on file, we will offload this responsibility to Stripe instead. But how do we then take payments from user payment cards? We will use the payment card tokens provided by Stripe. This token represents a payment card that a user has authorised. Let’s see how we can collect these tokens in Laravel, so we can use them to set up new subscriptions.
Thanks to Stripe's embedded form fields (a feature of Stripe.js), we can handle this without the sensitive data ever touching our server.
Here's an example of how you could set up a subscription form view using Laravel's Blade templating engine:
<!DOCTYPE html>
<html>
<head>
    <title>Subscribe</title>
    <link href="https://cdn.jsdelivr.net/npm/[email protected]/dist/css/bootstrap.min.css" rel="stylesheet" integrity="sha384-rbsA2VBKQhggwzxH7pPCaAqO46MgnOM80zW1RWuH61DGLwZJEdK2Kadq2F9CUG65" crossorigin="anonymous">
</head>
<body>
<body class="vh-100">
    <div class="container h-100 d-flex justify-content-center align-items-center">
        <form action="{{ route('subscription.store') }}" method="post" id="payment-form" style="min-width: 300px;">
            @csrf

            @if(session('message'))
                <div class="alert alert-success">
                    {{ session('message') }}
                </div>
            @endif
            @if(session('error'))
                <div class="alert alert-danger">
                    {{ session('error') }}
                </div>
            @endif

            <div class="form-group">
                <label for="card-holder-name" class="label">Card Holder Name</label>
                <input id="card-holder-name" type="text" class="form-control text-sm">
            </div>

            <div class="form-group mt-3">
                <!-- Stripe Elements Placeholder -->
                <div id="card-element" class="form-control"></div>
            </div>

            <button type="submit" id="card-button" class="btn btn-primary mt-4">Subscribe</button>
        </form>
    </div>
    <script src="https://cdn.jsdelivr.net/npm/[email protected]/dist/js/bootstrap.bundle.min.js" integrity="sha384-kenU1KFdBIe4zVF0s0G1M5b4hcpxyD9F7jL+jjXkk+Q2h455rYXK/7HAuoJl+0I4" crossorigin="anonymous"></script>

    <script src="https://js.stripe.com/v3/"></script>

    <script>
        const stripe = Stripe('{{ env("STRIPE_KEY") }}');
        const elements = stripe.elements();
        const cardElement = elements.create('card');
        cardElement.mount('#card-element');

        const cardHolderName = document.getElementById('card-holder-name');
        const cardButton = document.getElementById('card-button');

        cardButton.addEventListener('click', async (e) => {
            e.preventDefault();

            const { paymentMethod, error } = await stripe.createPaymentMethod(
                'card', cardElement, {
                    billing_details: { name: cardHolderName.value }
                }
            );

            if (error) {
                // Display the error to your customer.
                console.log(error);
            } else {
                // Send the token to your server.
                let form = document.getElementById('payment-form');
                let hiddenInput = document.createElement('input');

                hiddenInput.setAttribute('type', 'hidden');
                hiddenInput.setAttribute('name', 'paymentMethod');
                hiddenInput.setAttribute('value', paymentMethod.id);

                form.appendChild(hiddenInput);
                form.submit();
            }
        });
    </script>
</body>
</html>
resources/views/subscription/create.blade.php
In this code, we've included a form for collecting the card holder's name, a placeholder div for Stripe to inject its secure card fields into, and a 'Subscribe' button. When the button is clicked, Stripe.js generates a payment method token, which we then inject into the form as a hidden input before finally submitting the form to our server.
On the server side, in the store() method of our SubscriptionController, we can then retrieve this token with $request->input('paymentMethod') and use it in the newSubscription() method as explained earlier. This way, the card data is securely handled by Stripe, and our server only ever sees the token.
This approach ensures we are following best security practices and helps make our application PCI-DSS compliant, as sensitive card data is never processed, stored, or transmitted by our server.
With these steps, you've successfully set up a subscription flow in your Laravel application. Now, let's test it!
Testing the Subscription Flow
It's essential to thoroughly test your subscription flow to ensure everything works as expected. Here, we'll discuss the process of testing the flow using Stripe's testing environment.
Testing with Stripe
Stripe provides a list of test card numbers that you can use to create payments in test mode. To test the subscription flow, you can use the card number 4242 4242 4242 4242, with any future date for the expiration, any 3-digit number for the CVC, and any valid postal code.
This card will always be approved in test mode. For more specific scenarios (e.g., to simulate declined payments), refer to the Stripe's Testing Documentation for other test card numbers.
Verifying the subscription
Once a test payment is made, you can verify whether a subscription has been created successfully by checking both your Stripe Dashboard and your Laravel application.
In your Stripe Dashboard, navigate to "Customers". You should see a new customer entry with the email you used during the test. Clicking on that customer will show their subscriptions, where you should see an active subscription for the plan you've set up.
In your Laravel application, you can check the database for the new subscription. If you used the newSubscription method as discussed above, Laravel Cashier would have automatically created a new entry in the subscriptions table in your database. You can verify this using Laravel's Tinker or by querying the database directly.
After verifying that our users can set up new subscriptions, let's move on to managing recurring payments.
Handling recurring payments
At this point, you have integrated Laravel Cashier, created a subscription model, and implemented a subscription flow. Now, let's take a look at how to handle recurring payments, which is an essential part of any subscription service.
Recurring payments are payments that are automatically charged on a schedule, which, in our case, is handled by Stripe. Once a customer subscribes to a plan, Stripe handles the billing cycle, automatically charges the customer's card when a new cycle begins, and notifies your Laravel application via Webhook events.
Setting Up Stripe webhooks
Stripe can send webhook events that notify your application any time an event happens on your account. This is particularly useful for events—like failed payments, subscription cancellations, or renewals—that your integration might need to know about.
To handle these events, Laravel Cashier offers a webhook controller that is already set up to handle the incoming requests. All you have to do is point a Stripe webhook endpoint to this controller.
In your Stripe Dashboard, go to Developers > Webhooks > Add endpoint, and add a new endpoint with the URL of your webhook handling route. By default, Laravel Cashier uses the /stripe/webhook route.
Don't forget to add the signing secret to your .env file:
STRIPE_WEBHOOK_SECRET=<your-stripe-webhook-secret>.env
This allows your application to authenticate the webhook events and ensure they're truly coming from Stripe.
Handling webhook events
Laravel Cashier's WebhookController handles several webhook events dispatched by Stripe, such as successful payments (invoice.payment_succeeded) or failed charges (invoice.payment_failed). It's important to note that these events should be defined in your webhook settings in the Stripe dashboard to ensure you receive them.
If you need to handle more webhook events other than those handled by Cashier, you should listen to the following events that are dispatched by Cashier:
Laravel\Cashier\Events\WebhookReceivedLaravel\Cashier\Events\WebhookHandled
Both events have the full payload of the Stripe webhook. For example, if you want to listen to the customer.subscription.updated event, you may register a Laravel Listener to handle that event:
<?php

namespace App\Listeners;

use Laravel\Cashier\Events\WebhookReceived;

class StripeEventListener
{
    /**
     * Handle received Stripe webhooks.
     */
    public function handle(WebhookReceived $event): void
    {
        if ($event->payload['type'] === 'customer.subscription.updated') {
            // Handle the incoming event...
        }
    }
}
app/Listeners/StripeEventListener.php
Once your listener has been defined, you may register it within your application's EventServiceProvider :
<?php

namespace App\Providers;

use App\Listeners\StripeEventListener;
use Illuminate\Foundation\Support\Providers\EventServiceProvider as ServiceProvider;
use Laravel\Cashier\Events\WebhookReceived;

class EventServiceProvider extends ServiceProvider
{
    protected $listen = [
        WebhookReceived::class => [
            StripeEventListener::class,
        ],
    ];
}
app/Providers/EventServiceProvider.php
Verifying webhook signatures
To prevent artificial webhooks forged by potential attackers, Stripe provides a webhook signatures which help you verify the validity of each webhook.
For convenience, Cashier automatically includes a middleware which validates that the incoming Stripe webhook request is valid.
To enable webhook verification, ensure that the STRIPE_WEBHOOK_SECRET environment variable is set in your application's .env file. The webhook secret may be retrieved from your Stripe account dashboard.
Now, let’s not forget about the security aspects of processing payments online, which we’ll look at in the next section.
Ensuring security and compliance
While Laravel Cashier and Stripe handle much of the heavy lifting when it comes to recurring payments, there are a few additional considerations to keep in mind to ensure the security and compliance of your payment system.
- Securing your payment pages
Always ensure that your payment and subscription pages are served over HTTPS. This protects your users' sensitive information as it's sent to your server. Thankfully, modern hosting providers and platforms like Laravel Forge make it straightforward to set up HTTPS for your site. - PCI DSS compliance
The Payment Card Industry Data Security Standard (PCI DSS) is a set of requirements for businesses that process card payments. It's designed to ensure that you handle credit card information in a way that reduces fraud. By using Stripe with Laravel Cashier, you're already minimising your PCI compliance burden. Stripe's payment forms securely capture the card data and send it directly to Stripe's servers, ensuring that sensitive cardholder data never touches your server. - Storing user data
When dealing with user data, it's crucial to store only what you need and secure it appropriately. Laravel Cashier helps here as well by taking care of the storage of your users' subscription and payment data. It stores references to customer objects, subscription details and payment methods on Stripe, keeping sensitive payment data off of your server. - GDPR compliance
The General Data Protection Regulation (GDPR) is a European Union law that gives citizens more control over their personal data. When you collect, store, or process the personal data of EU residents, you must comply with the GDPR. Considerations include getting explicit consent for data collection, ensuring data is anonymized or pseudonymized where possible, and respecting users' rights to access or delete their data.
By taking these additional steps, you can ensure that your Laravel application is not just functional and user-friendly, but also secure and compliant with key regulations. Building trust with your users is essential for a successful subscription service, and respecting their privacy and security is a big part of that.
Conclusion and next steps
Setting up recurring payments in your Laravel application with Laravel Cashier and Stripe can significantly streamline your billing processes and provide an efficient and enjoyable user experience. It gives you the power to offer your customers the convenience of automatic payments while maintaining a high level of security and regulatory compliance.
Here's a quick recap of what we've covered:
- We have introduced the Laravel Cashier package and how it simplifies handling payments in Laravel applications.
- We have explained how to set up Laravel Cashier with Stripe and how to configure it in your Laravel application.
- We've created a subscription model and integrated it into a registration flow.
- We've delved into handling recurring payments, including how to set up and handle Stripe webhooks.
- Lastly, we've addressed some crucial considerations for maintaining the security and compliance of your payment system.
Now that you have implemented a recurring payment structure in your Laravel application, the next steps could be to expand your payment system with additional features, such as:
- Multiple subscription plans: Laravel Cashier makes it easy to offer multiple subscription plans to your users, each with different prices and billing intervals.
- One-time add-ons and invoicing: You could allow users to purchase one-time add-ons or services, and include these charges in their next invoice.
- Trial periods: Consider offering trial periods to your users. Laravel Cashier has built-in support for this as well.
- Discounts and coupons: To boost user signups, you might want to implement discounts or coupon codes.
Remember that offering a range of options will cater to a larger audience and potentially boost your user acquisition and retention. Happy coding and here's to your success in the world of online subscriptions and recurring payments!
Want to skip the complexity of building and maintaining your own billing infrastructure?
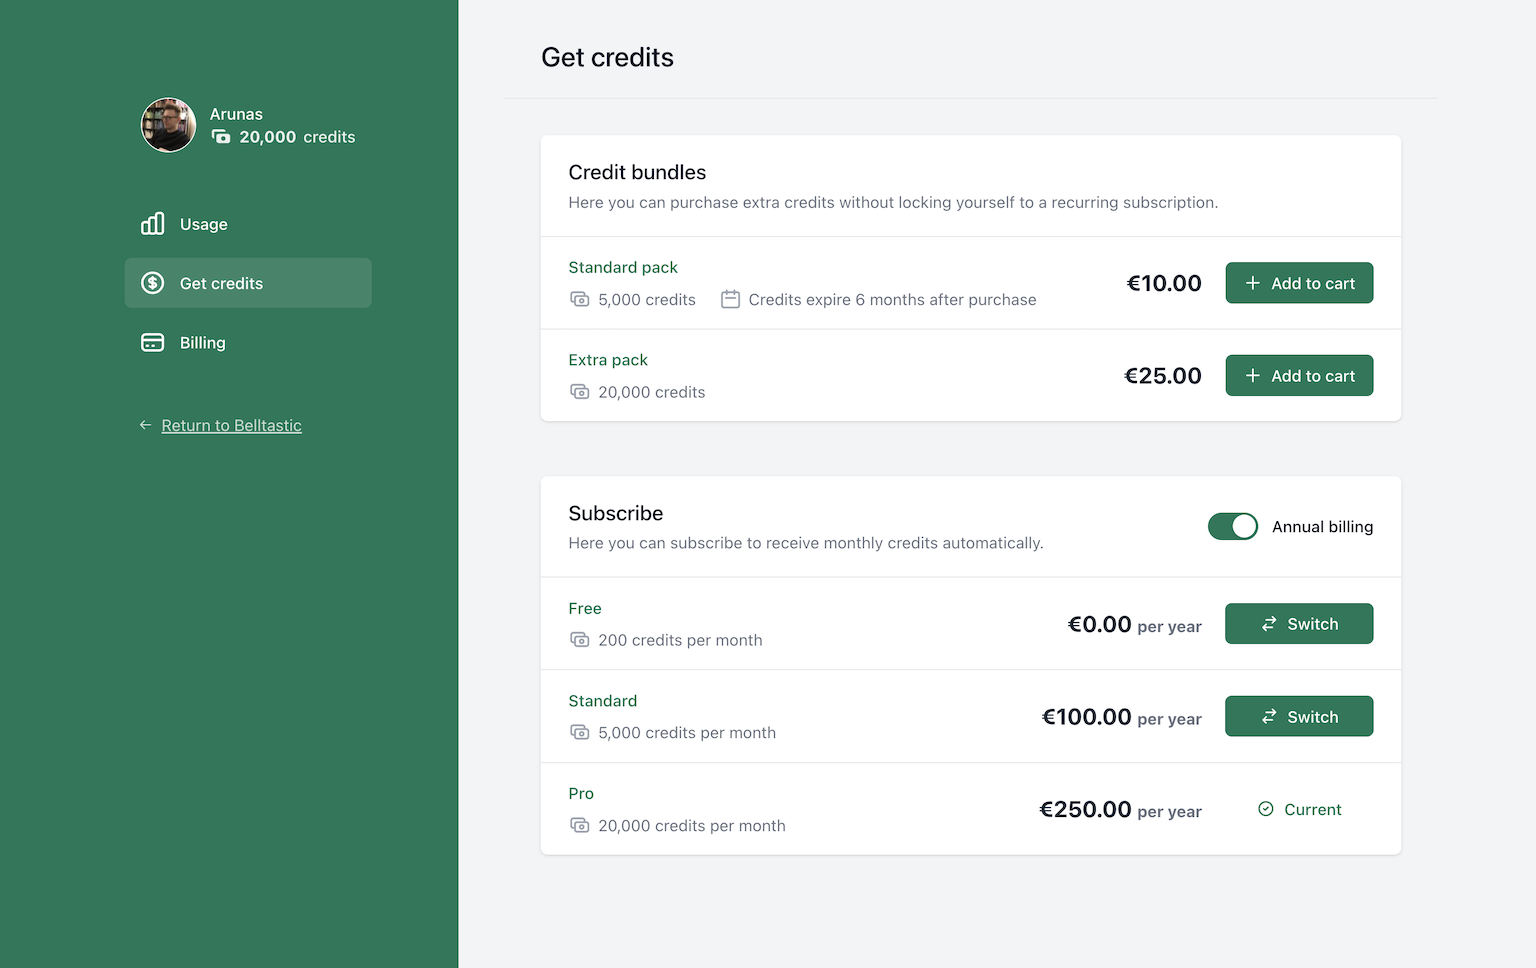
Spike Billing provides a complete, self-hosted billing solution that integrates seamlessly with both Stripe and Paddle. Your customers get a fully-featured portal to manage their subscriptions, one-time purchases, and billing details, while you maintain full control over the experience.
Get started in minutes with our Laravel package, or explore our extensive customization options to match your specific business needs. Visit documentation to get started, or have a look at a live demo.